February 5th, 2024 · Comments Off on Join Me for an Exclusive Cookbook Signing Event with Cajun Chef Ryan at Barnes & Noble
Saturday, March 9, 2024 – Noon-2:00pm
3414 U.S. Hwy 190 Suite 10, Mandeville, LA 70471
I’ll be at the Mandeville, LA Barnes & Noble on Saturday, March 9th from Noon to 2:00pm for a book signing event. Come out and lets talk local food, Cajun, Creole, and good ole home cooking. And pick up a signed copy of one of my three cookbooks, too. Looking for to seeing you there.
Comments Off on Join Me for an Exclusive Cookbook Signing Event with Cajun Chef Ryan at Barnes & NobleTags:Book Review
December 8th, 2023 · Comments Off on How to Make Authentic Chicken Enchiladas: A Step-by-Step Guide
Mexican cuisine is a rich tapestry of flavors, colors, and traditions that have evolved over centuries. Among its many culinary delights, chicken enchiladas stand out as a beloved dish that has become a symbol of Mexican comfort food. In this exploration, we’ll delve into the fascinating history, cultural significance, and influences that have shaped the delightful journey of chicken enchiladas in Mexican cuisine.
Before we explore the recipe inspired by the Community Table at Lowes Foods and the Chicken Kitchen, lets review more about how we got here today!
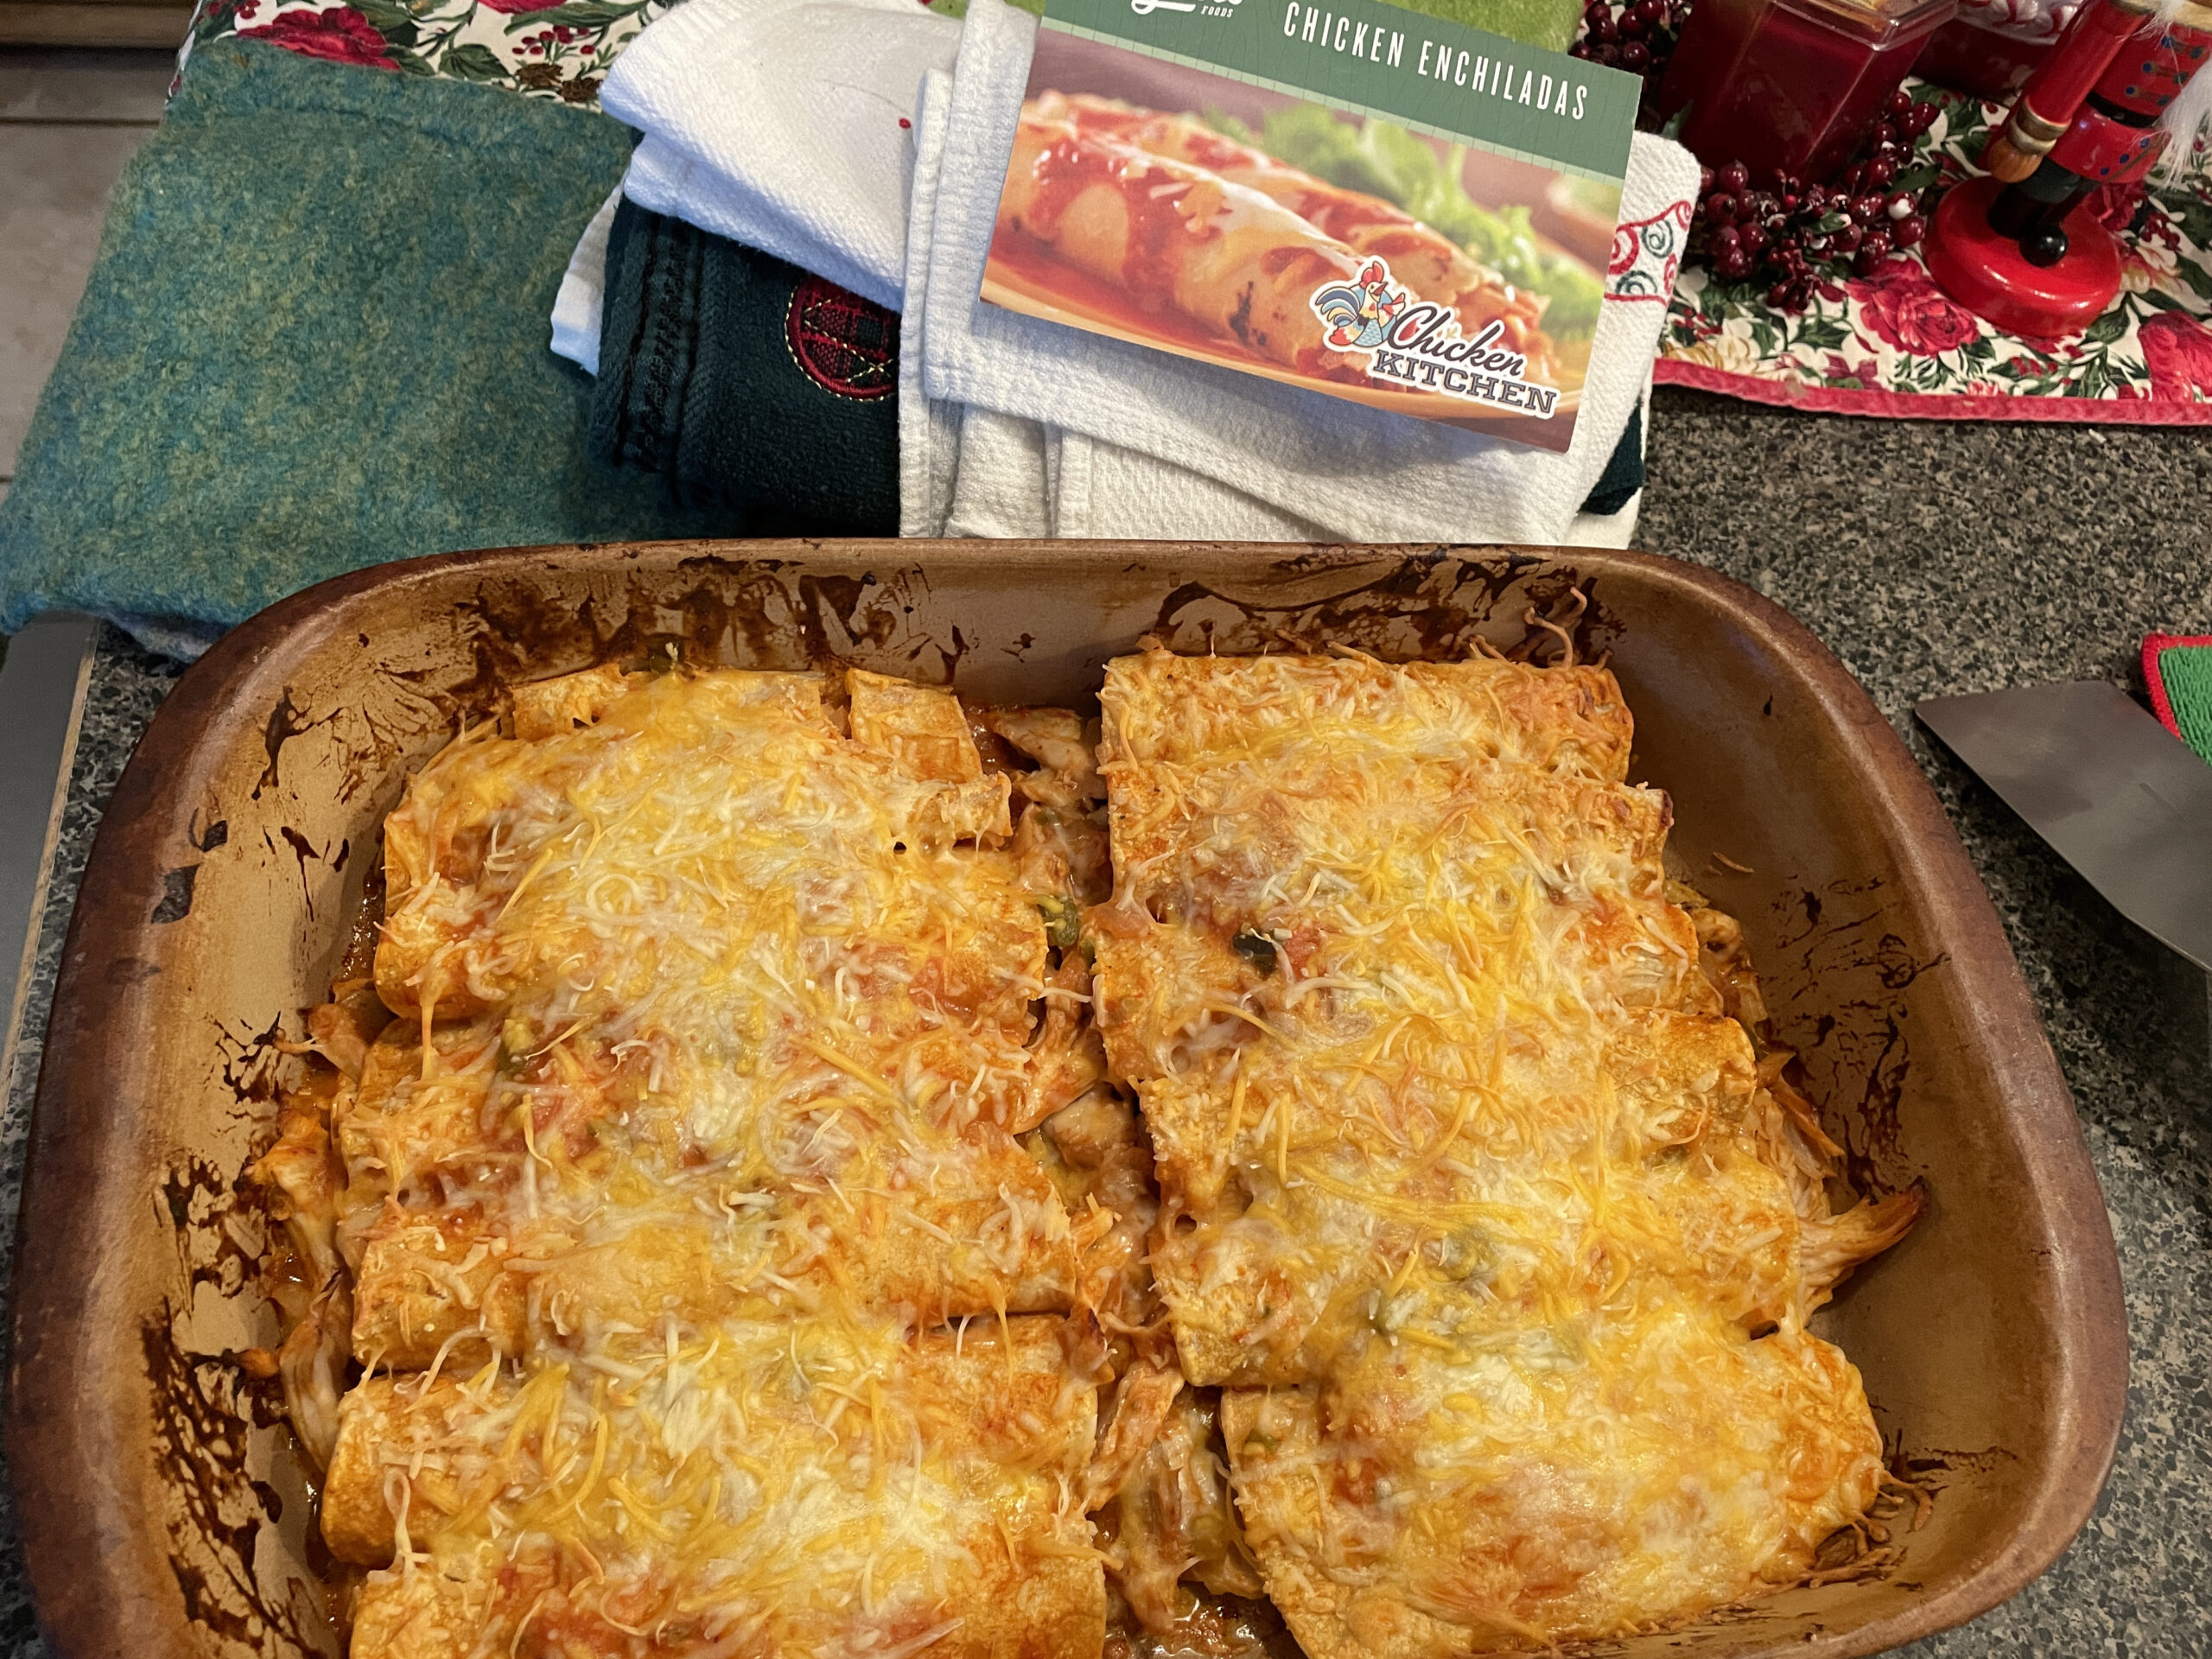
Chicken Enchiladas in the pan and Lowes Foods recipe card
A Tapestry of Flavors: The Origins of Chicken Enchiladas
The roots of chicken enchiladas can be traced back to ancient civilizations, where corn and chilies were dietary staples. The Aztecs, known for their sophisticated culinary techniques, are credited with the creation of tortillas and the art of rolling them with various fillings – a precursor to the modern enchilada. The word “enchilada” itself comes from the Spanish verb “enchilar,” meaning “to season with chili.”
Evolution Through Time: Adapting to Local Tastes
As Spanish conquistadors introduced new ingredients such as dairy products and meats, the enchilada underwent a transformation. The fusion of indigenous and Spanish flavors resulted in the diverse array of enchiladas we enjoy today. The addition of cheese, crema, and other ingredients not only enhanced the dish’s taste but also reflected the evolving cultural landscape of Mexico.
Regional Variations: A Culinary Mosaic
Mexico’s vast and diverse geography has given rise to regional variations of chicken enchiladas. In the coastal regions, seafood enchiladas are a delicacy, featuring fresh catches and vibrant salsas. Inland, mole sauce adds a rich, complex flavor to the dish, showcasing the influence of indigenous ingredients like chocolate, nuts, and spices. Each region’s unique climate and agriculture contribute to the distinctiveness of their enchilada recipes.
Celebrations and Traditions: Chicken Enchiladas in Mexican Culture
Chicken enchiladas are not just a dish; they’re an integral part of Mexican culture and celebrations. From family gatherings to holidays and fiestas, these flavorful delights often grace the tables, symbolizing warmth, togetherness, and the joy of shared meals. The preparation and consumption of enchiladas are deeply embedded in the fabric of Mexican hospitality.
Influences on the Global Stage: Chicken Enchiladas Beyond Borders
The popularity of Mexican cuisine, including chicken enchiladas, has transcended borders. Mexican restaurants worldwide offer their interpretations of this classic dish, adapting to local tastes while preserving its essence. The global appeal of chicken enchiladas speaks to the universal love for the bold, harmonious flavors that characterize Mexican cooking.
The Recipe
During my tenure at Lowes Foods as the Community Table Manager at both the Cary, and Knightdale stores in North Carolina, I had the incredible opportunity to foster a sense of community through the shared experience of food. Guiding the creation and execution of events at the community table, I facilitated a space where customers came together to connect, learn, and savor the joys of good food. From organizing cooking classes to hosting local artisans, my role involved curating a diverse range of events that not only enriched our customers’ culinary knowledge but also strengthened the bonds within the community. Through this role, I discovered the power of food as a catalyst for building connections and creating memorable moments in the heart of the community.
I prepared this recipe several times and when I made it again at home last week, the smells and flavors reminded me and took me back to the store, fond memories as I share the recipe card. Note the check marks on the card, I used each recipe card as my shopping list as I went through the store collecting the items I needed for the cooking demonstration and tasting.
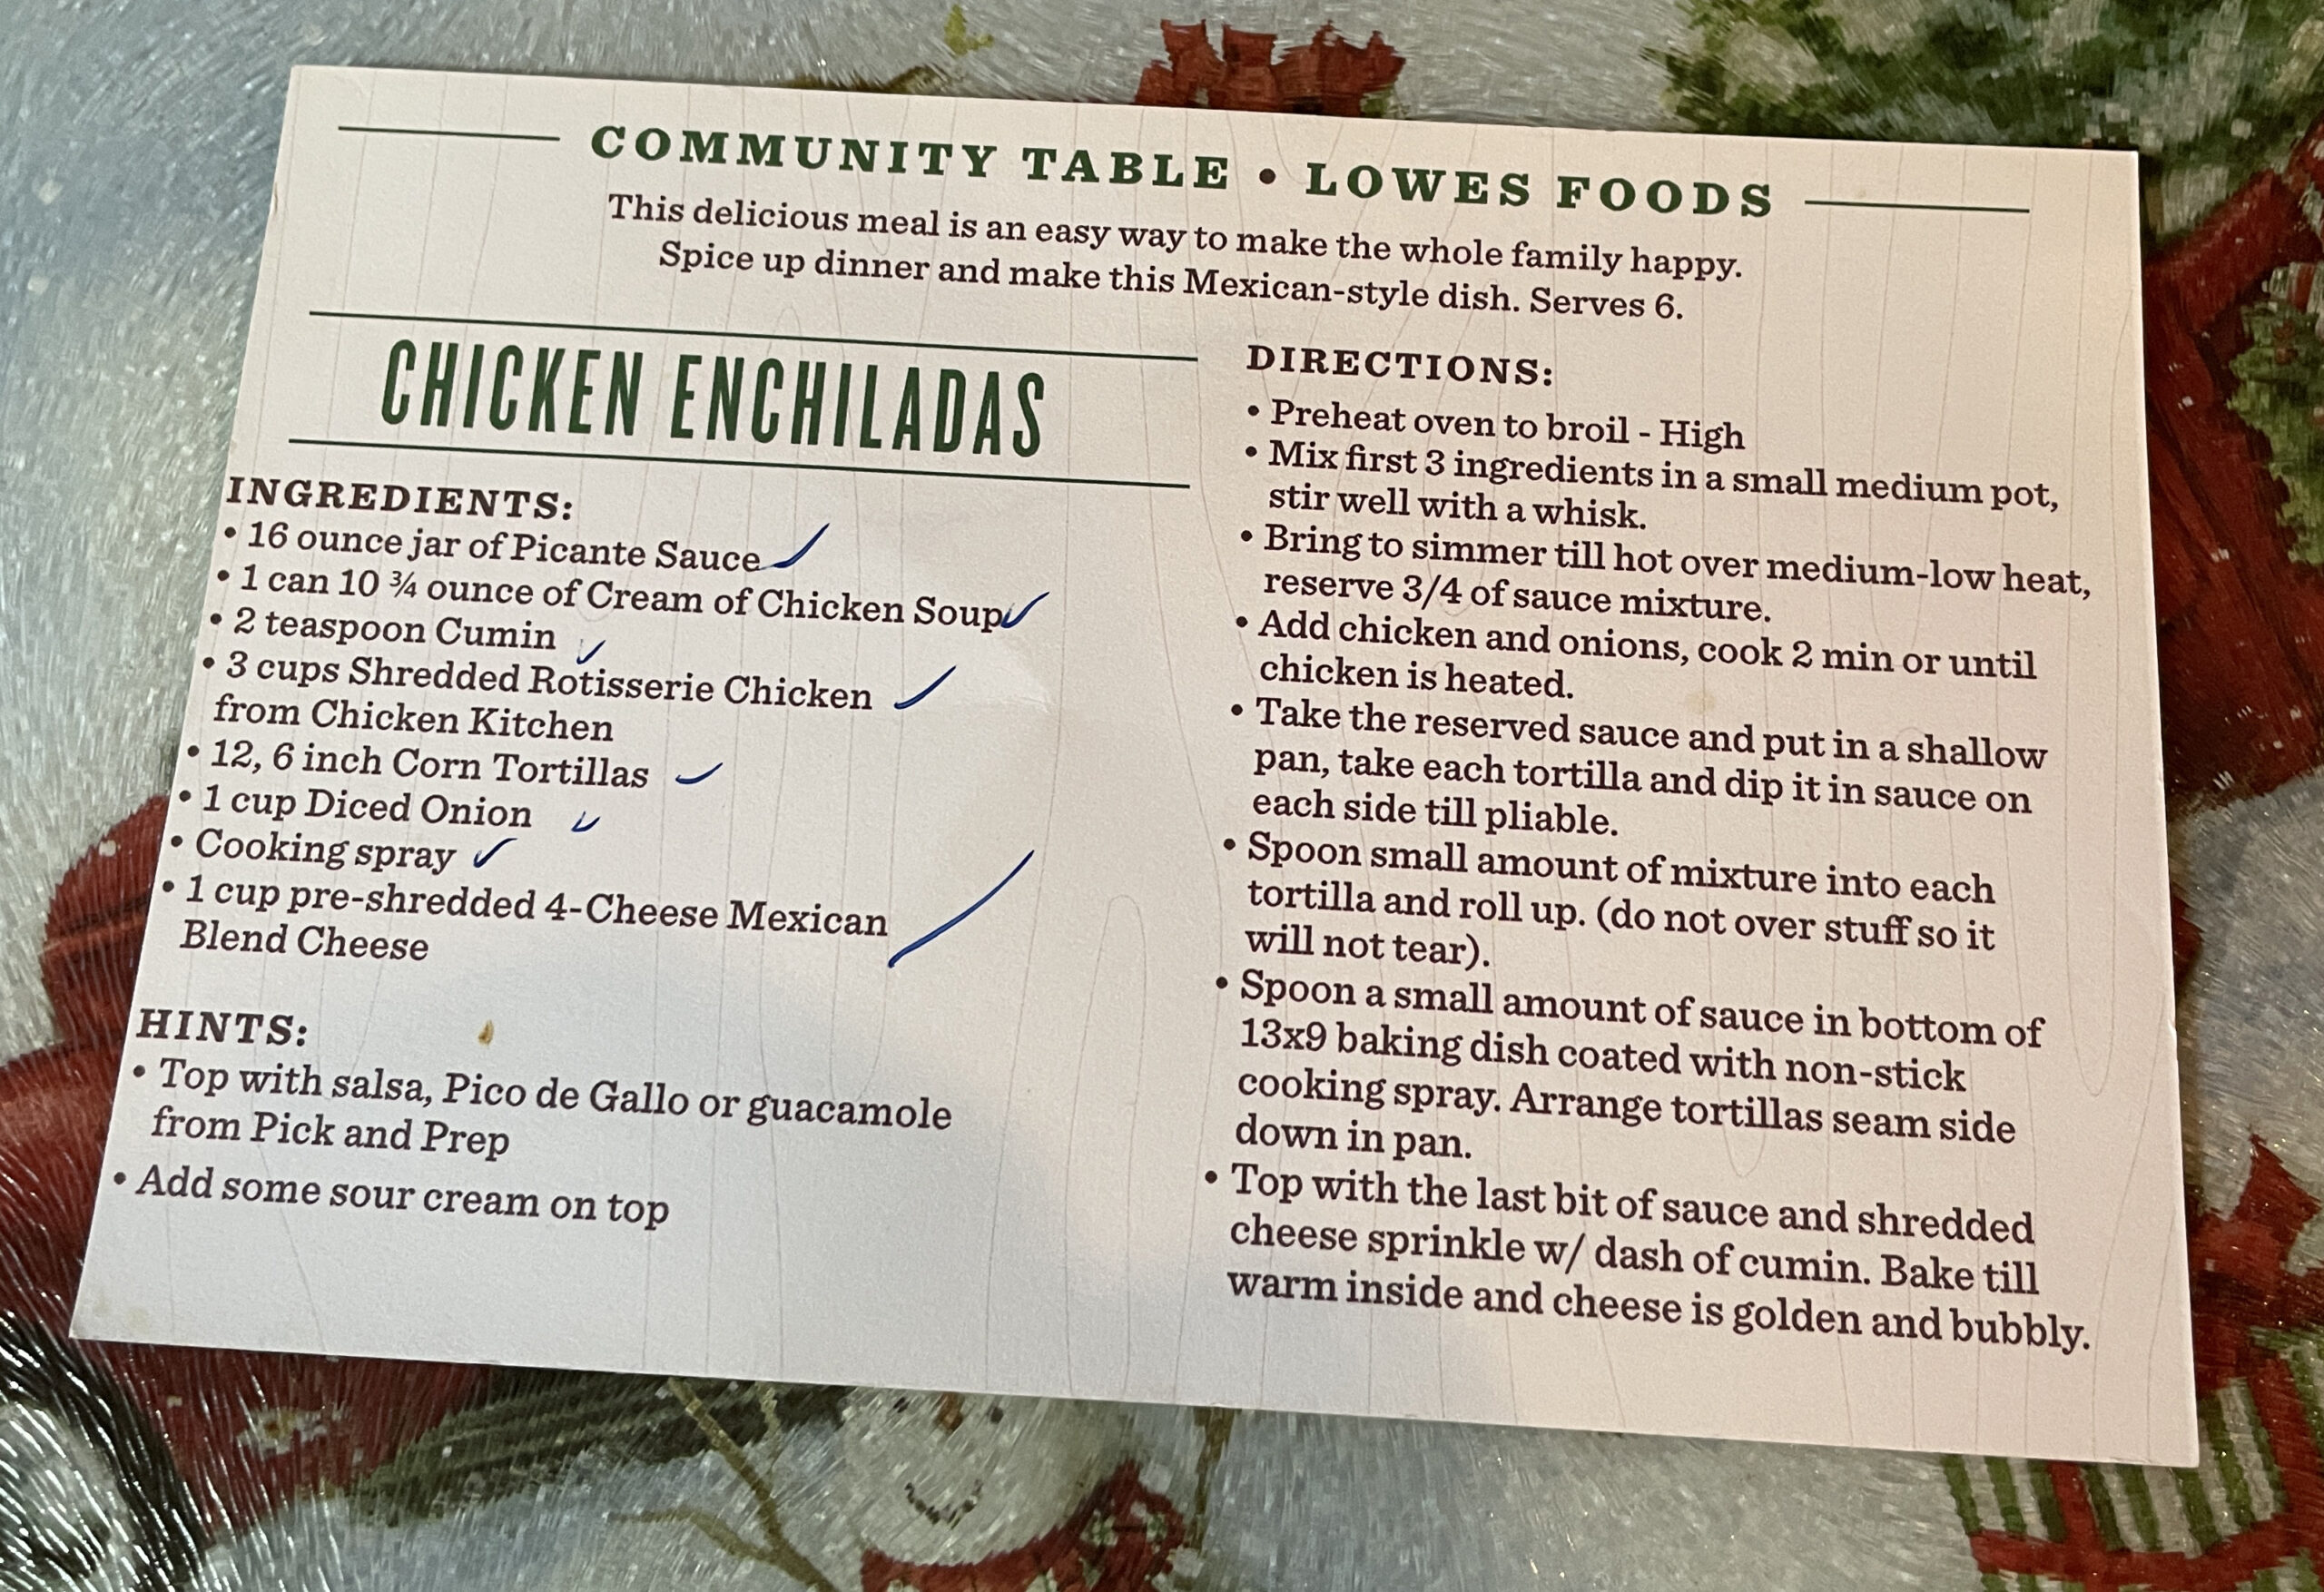
Community Table ~ Lowes Foods ~ Chicken Enchiladas Recipe Card
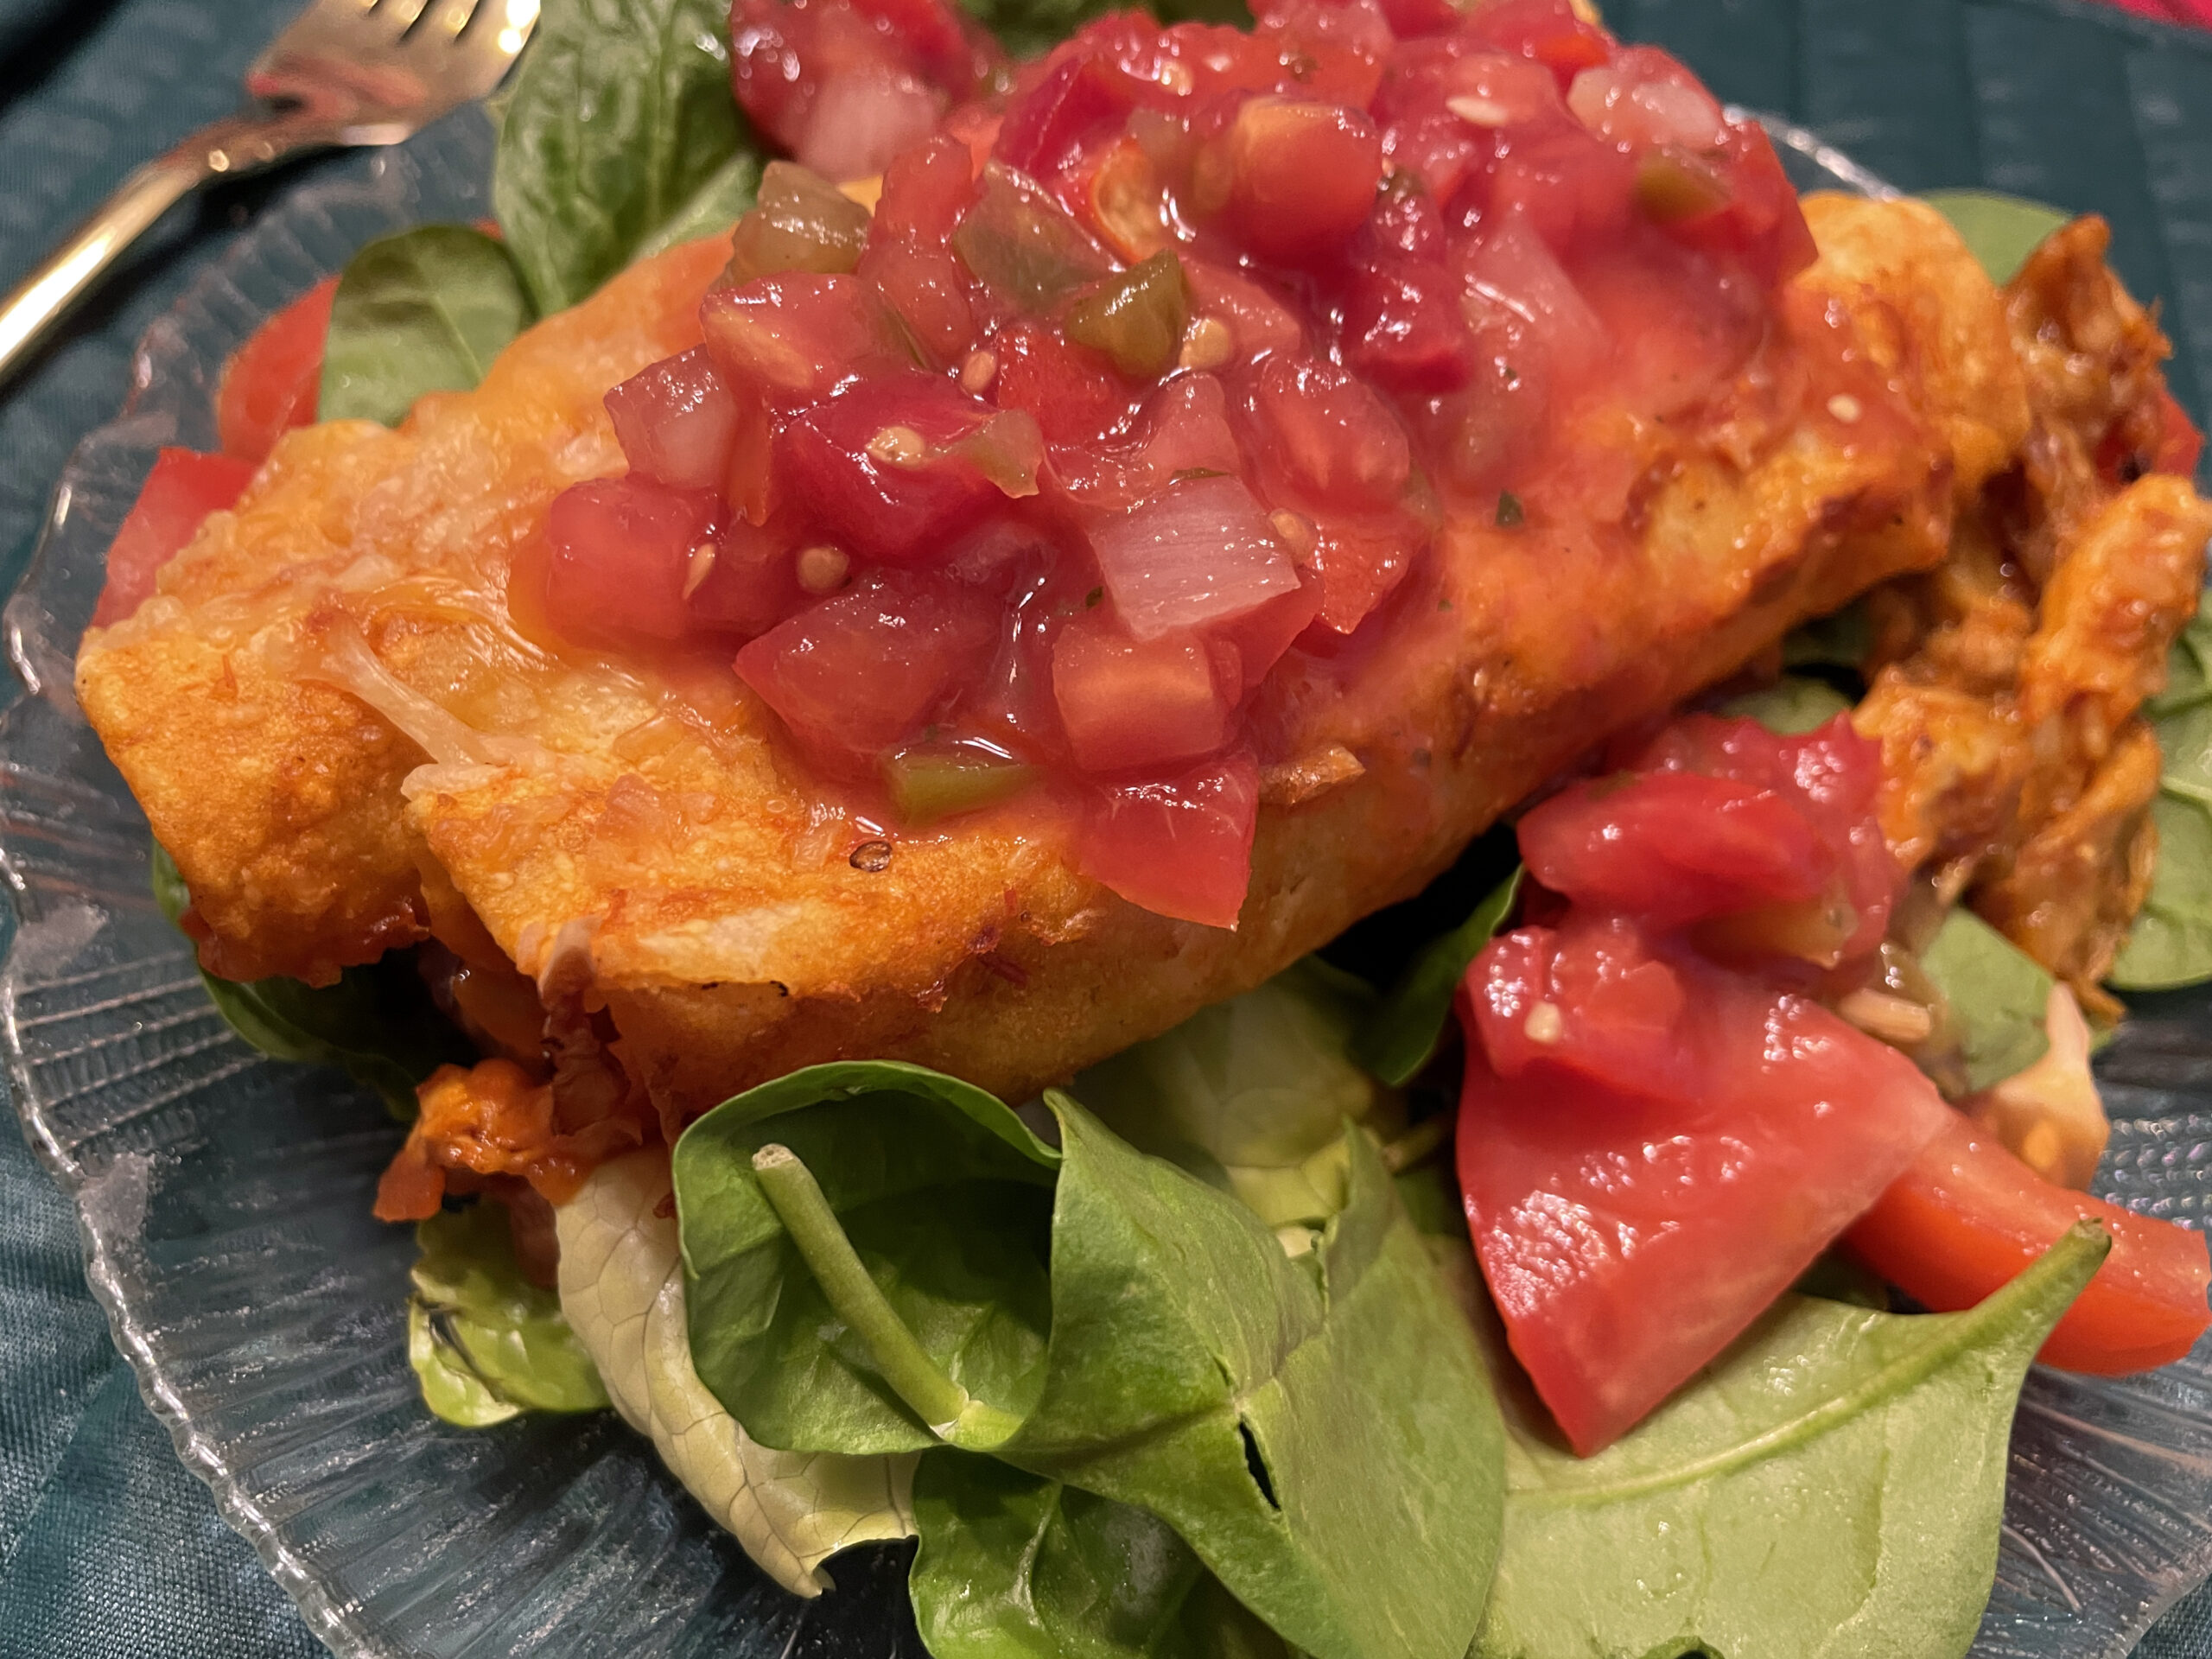
Chicken Enchiladas Plated
Comments Off on How to Make Authentic Chicken Enchiladas: A Step-by-Step GuideTags:Mexican · Recipes
December 7th, 2023 · Comments Off on How to Prepare Creole Catfish Delight: A Southern Comfort Cuisine Recipe
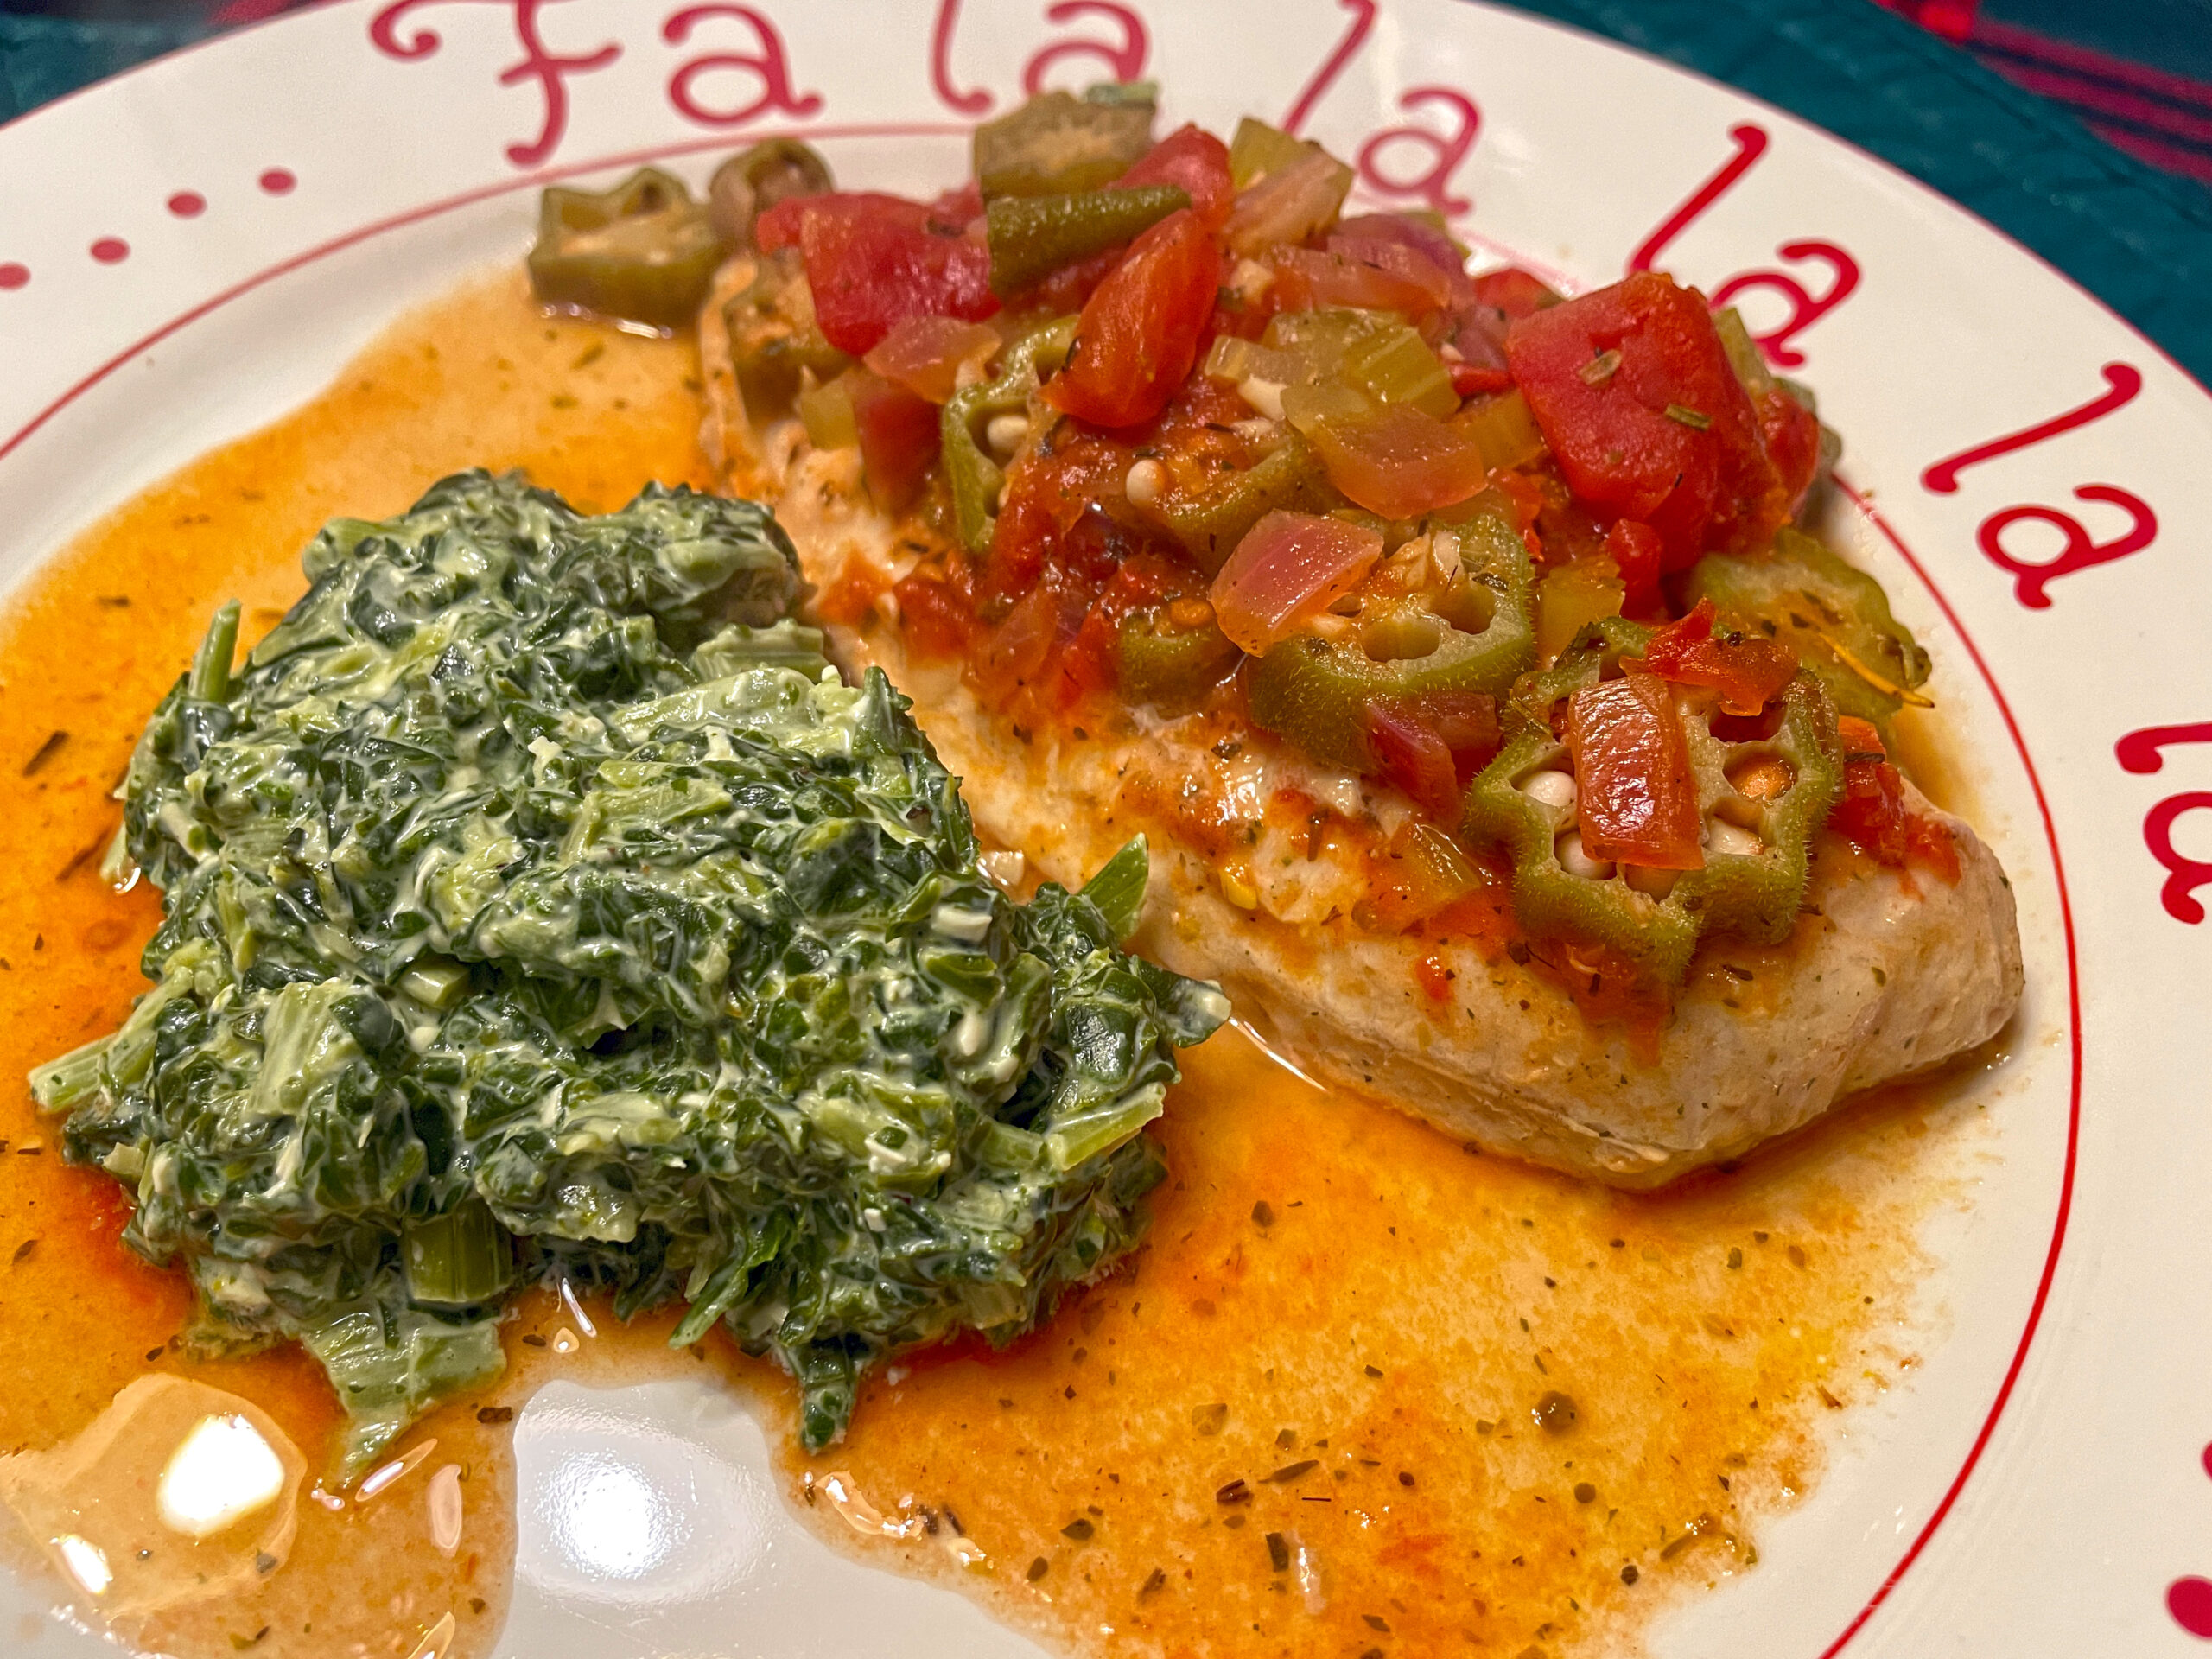
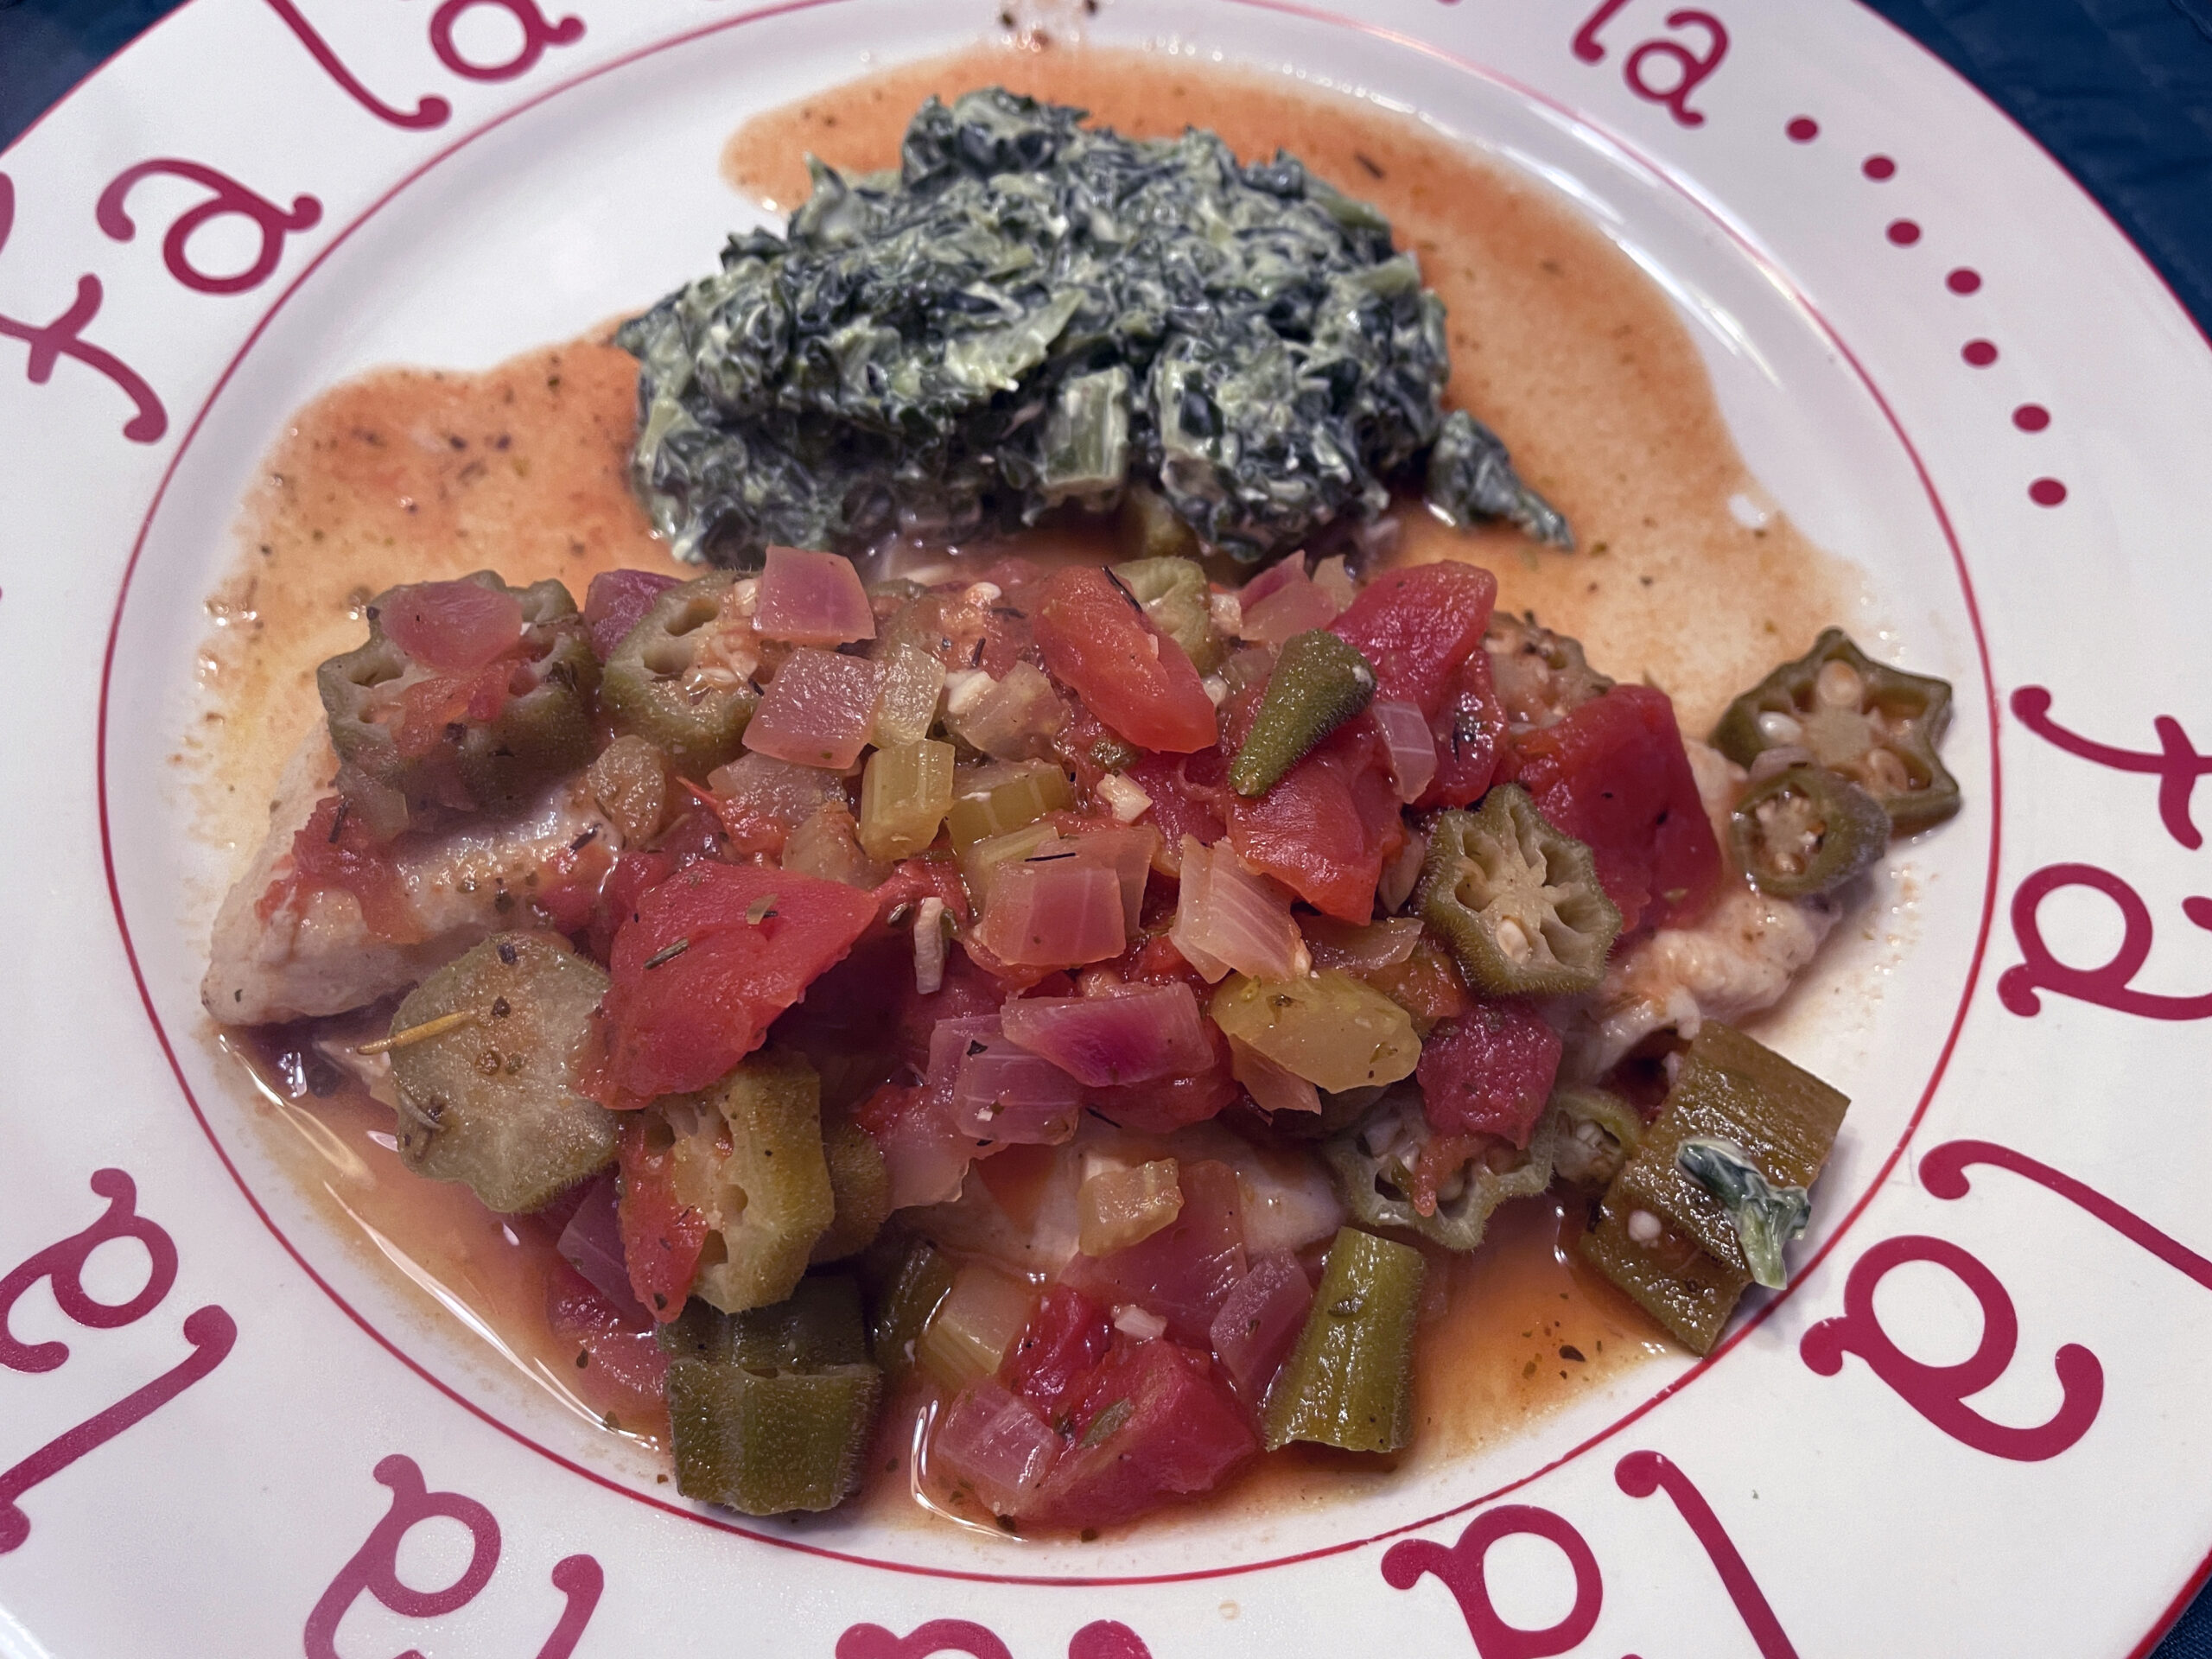
Creole Catfish served with creamed spinach on the side
Creole cuisine, with its rich blend of flavors and cultural influences, has an irresistible charm that captivates the taste buds. One dish that truly embodies the spirit of Creole cooking is Creole Catfish Delight. This recipe takes the succulent, mild flavor of catfish and infuses it with a medley of spices, creating a dish that’s both comforting and exciting. Let’s dive into the world of Creole flavors and create a delightful Creole Catfish experience in your own kitchen.
In the heart of the South, where the air is thick with the aroma of spices and the warmth of hospitality, there lies a culinary masterpiece that embodies the spirit of the region – Creole flavors paired with local catfish. This blog post invites you on a gastronomic journey, exploring the vibrant palette of Creole cuisine intertwined with the succulence of fresh, local catfish. Join us as we delve into the rich cultural tapestry that makes this pairing an unforgettable culinary experience.
Embracing Creole Flavors:
Creole cuisine is a celebration of diversity, blending influences from French, African, Spanish, and Native American culinary traditions. The result is a symphony of flavors that dance on the taste buds. From the robust kick of Creole seasoning to the aromatic blend of onions, bell peppers, and celery, each element contributes to the unique and soul-satisfying taste that defines Creole dishes.
Local Catfish: A Southern Delicacy:
Nestled in the waterways of the South, catfish is a local delicacy cherished for its mild, tender flesh. Sourced from nearby rivers and farms, local catfish adds a touch of authenticity to Creole-inspired dishes. Its versatility allows it to absorb the bold flavors of Creole seasonings, creating a harmonious marriage of taste and texture.
This recipe utilizes diced red onion, diced tomatoes, sliced okra, minced garlic, white wine, chicken stock and then ends with poaching the catfish in the flavorful liquid.
Recipe: Creole Catfish Delight
Ingredients
1 teaspoon olive oil ½ red onion, diced 1 rib celery, diced 2 cloves garlic, minced ½ teaspoon Creole seasoning ½ teaspoon garlic salt 1 cup white wine 1 cup chicken stock 1 can diced tomatoes with garlic and basil (14.5oz) 2 cups sliced okra Juice of 1 fresh lemon 2 catfish filets (6-oz each)
Directions
Heat olive oil in a saucepan over medium heat, add the onions and celery and sauté until transparent. Add the garlic and Creole seasoning and continue to cook for 1-minute. Add the white wine and reduce by 2/3. Add the chicken stock, diced tomatoes and liquid, and okra, bring to a simmer, cover, reduce heat and continue simmering about 10-minutes
Add lemon juice and catfish filets, and cover the filets with some of the okra and tomatoes. Cover and simmer until catfish is cooked through to 145˚ F internal temperature, or about 8-10 minutes.
Serve each catfish filet with the okra and tomatoes.
The Perfect Pairing:
Creole Catfish Delight is not just a meal; it’s a celebration of regional identity and culinary prowess. Pair this delectable dish with local sides like creamed spinach, collard greens, hushpuppies, or cornbread for an authentic Southern feast. Whether shared with loved ones or enjoyed in solitude, this pairing captures the essence of Southern comfort on a plate.
In every bite of Creole Catfish Delight, you taste the soul of the South. It’s a culinary journey that transcends flavors, connecting you to the rich history and cultural tapestry of the region. So, roll up your sleeves, gather your ingredients, and embark on a gastronomic adventure that brings Creole flavors and local catfish together in perfect harmony.
Creole Catfish Delight
Exploring Creole Resources
Exploring Creole flavors can be an exciting culinary journey, and there are various online resources that provide recipes, insights, and information about Creole cuisine. Here are some websites and platforms where you can find valuable resources for Creole flavors:
New Orleans Online, a hub for all things related to New Orleans, offers a variety of Creole and Cajun recipes inspired by the city’s rich culinary heritage.
Saveur’s collection of Creole recipes includes traditional dishes and modern twists, celebrating the flavors of Louisiana.
Exploring these resources will not only provide you with delicious recipes but also deepen your understanding of the unique and vibrant flavors that define Creole cuisine.
Comments Off on How to Prepare Creole Catfish Delight: A Southern Comfort Cuisine RecipeTags:Creole · Seafood
December 4th, 2023 · Comments Off on Spice It Up: The Ultimate Guide To Homemade Pepper Jelly – Easy Recipe And Creative Pairings For A Flavorful Culinary Adventure!
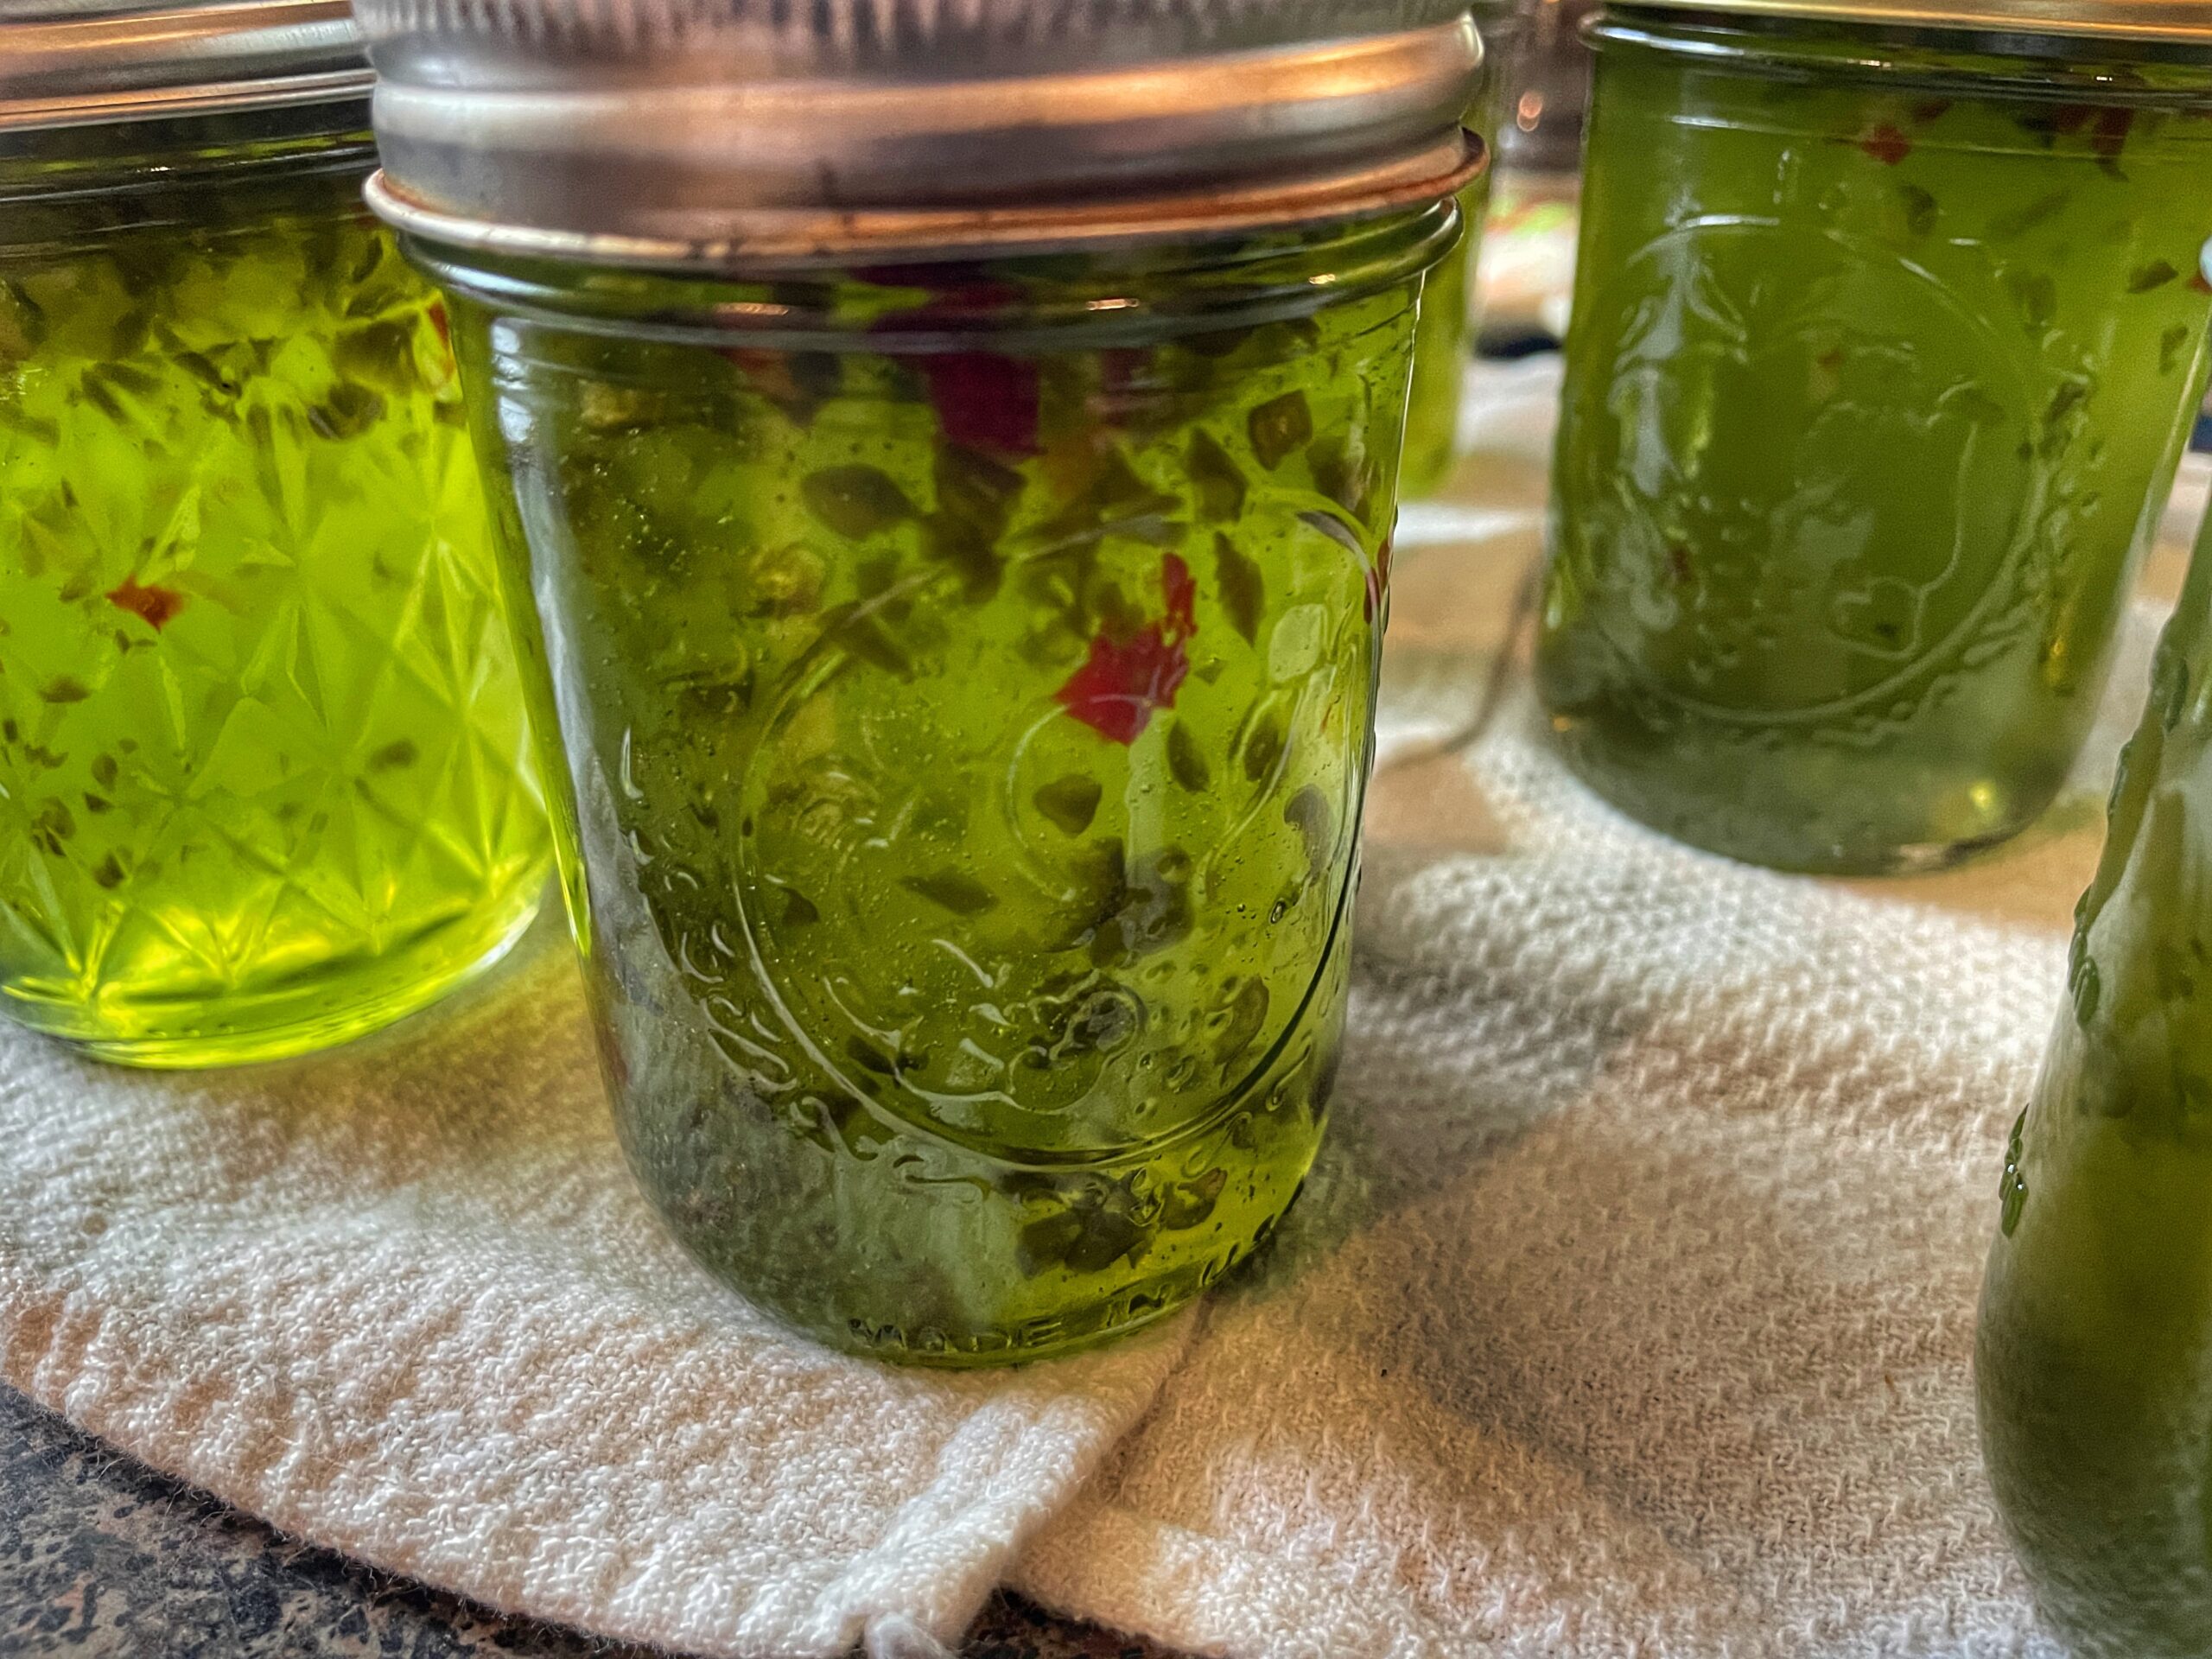
Pepper Jelly
This recipe is modified from our Aunt Debbie’s recipe and I modified it again from my first batch, as I doubled bell pepper and jalapeño quantity.
Welcome to a world of vibrant flavors and culinary excitement! Today, we’re diving into the realm of pepper jelly, a versatile and mouthwatering condiment that adds a spicy kick to your favorite dishes. Whether you’re a seasoned chef or a kitchen newbie, making your own pepper jelly is a rewarding adventure that will elevate your culinary creations to new heights.
Unveiling the Magic of Pepper
Jelly Pepper jelly is not just a condiment; it’s a flavor-packed revelation that can transform ordinary meals into extraordinary culinary experiences. The marriage of sweet and spicy creates a symphony of tastes that dance on your taste buds, leaving you craving more. The beauty of pepper jelly lies in its ability to pair seamlessly with both savory and sweet dishes, making it a kitchen essential.
The DIY Pepper Jelly Advantage
Why settle for store-bought when you can craft your own pepper jelly masterpiece? DIY pepper jelly allows you to control the heat level, experiment with unique pepper combinations, and tailor the sweetness to your liking. Plus, it’s a fantastic way to impress friends and family with a homemade treat that showcases your culinary prowess.
Pepper Jelly Pairings That Will Blow Your Mind
Get ready to elevate your meals with tantalizing pairings! From spreading it on warm, crusty bread to glazing meats with its sticky goodness, pepper jelly knows no bounds. Explore the world of unexpected flavor marriages, like pairing it with creamy cheeses, using it as a glaze for grilled vegetables, or even incorporating it into desserts for a sweet and spicy twist.
The Pepper Jelly Pantry Staples
To embark on your pepper jelly adventure, you’ll need a few key ingredients that are likely already hiding in your pantry. Stock up on fresh peppers, high-quality vinegar, sugar, and pectin, and you’ll be well on your way to creating a batch of pepper jelly that will have everyone asking for your secret recipe.
In conclusion, pepper jelly is the culinary secret weapon that adds pizzazz to your dishes and makes you the star of your kitchen. With its explosive flavor profile and endless pairing possibilities, homemade pepper jelly is a delightful journey into the world of culinary creativity. So, roll up your sleeves, gather your ingredients, and get ready to embark on a pepper jelly adventure that will make your taste buds sing!
The recipe
Ingredients
2 boxes Sure Jell 3 cups water 13 cups sugar 3 cups apple cider vinegar 4 cups finely chopped bell pepper 1/2 cup chopped jalapeño peppers (red and green) 4 drops green food color
Equipment
2 small pots 1 large processing pot with spacers 1 large jelly pot 1 wooden spoon 14 1/2-pint mason jars with 14 lid/band sets Jar clamp tool Large tongs Lid tool Head space measure tool Funnel tool
Directions
Wash and sanitize jars, lids, and bands. Transfer the lids and bands to a small pot covered in water and keep on a low simmer to sanitize. Set up a processing pot with spacers, add jars, cover, and bring to a simmer to sanitize.
Add Sure Jell to 3 cups water in a small pot, whisk well and bring to a simmer for 2 minutes over medium heat. Remove from heat and set aside.
In a very large pot add sugar and vinegar stir to dissolve with a wooden spoon over medium low heat. Bring to a boil stirring constantly for about five minutes.
To the sugar/vinegar mixture add peppers, dissolved sure jell and food color, simmer 2 minutes then turn off the heat and stir constantly for about 10 minutes
Put jelly in jars with 1/4” headspace. Wipe rims and seal with lids and bands finger tight.
Place in water bath covered at least 1-inch. Process jars 10-minutes. Turn off heat, let sit for 10-minutes, remove jars from water bath. Cool to room temperature on a kitchen towel. Once fully cooled, tighten the bands, wipe any spilled jelly and label. Store in a cool dry place for up to 1-year.
Recipe makes 14 half pint jars, plus a small amount leftover to enjoy immediately.
Notes from Debbie: I use the frozen bell peppers, chopped, and in the jar of chopped jalapeño peppers makes life really easy, but if y’all have fresh, that is great, you can use any color bell peppers you want.
Comments Off on Spice It Up: The Ultimate Guide To Homemade Pepper Jelly – Easy Recipe And Creative Pairings For A Flavorful Culinary Adventure!Tags:Canning · Recipes